
nostalgeo wins the audience award at Apps For Europe
After winning AppsforGeo and AppsforFlanders, nazka's nostalgeo also won the audience prize at Apps for Europe.
read more
30 may 2024
In our last post we covered how you can evaluate the design of your interactive map by investing time in user testing. Now we are going to take you through the technical steps to bring your design idea to a fully interactive experience.
Creating a prototype is the next major step of the design process after deciding the potential user groups that will interact with the application later on. Even though creating an interactive prototype goes through multiple stages and processes, let's divide these processes into two major groups. We will make it easier to follow with a small design illustration and go over possible ways to achieve your goal in creating an interactive prototype for a map-based application in Figma.
Low fidelity prototype
One of the first steps in the design process is to map the user personas, decide on the basic page layout, and construct the user flow. Depending on the available time and the amount of information you have about the project, you can create a low fidelity design by paper prototyping or wireframing.
Paper prototyping
As the name indicates, this includes sketching the basic layout on paper. This is an interesting step if you are starting a new project or complete redesign because it creates a space for you to bring all your ideas together. Not only that, it's also a great way to collect feedback from colleagues and stakeholders in an early stage of the project.
Wireframing
This is the stage where you digitse the first ideation steps and user flows. It can easily be seen as a blueprint for the final design, holding the design elements and their placement.
Now, you might ask, 'Where is the challenge in creating a low-fidelity prototype for a map-based application?' The design process is pretty much a standard process that designers use in all projects, but the challenges here circle around the type of project, namely map-based.
In a map-based application, the map is the centre of the application. This means you have to consider the map as you go and create elements for user interaction at each step of the flow. Another aspect to keep in mind is that even if the goal is to create a design for a map-based application, it still might have common website flows at the same time, so the design should also accommodate those.
High fidelity prototype
A high fidelity prototype is the design with the most similar look and feel to the final project. This means that high fidelity prototypes are similar in terms of colour, user interaction, including animations, and the size dimensions of each element as we keep it pixel-perfect.
As mentioned above, a high fidelity prototype is the next phase of the design process after completing the paper prototype and wireframing. In an ideal situation, the application's basic layout, design elements' placement, and user flow have already been decided and well documented in the previous phase.
Interactive prototype in Figma
If you have been involved in a design project or even spent time on a tech-related project, you have likely heard about Figma or even worked with it. However, if you haven't already done so, Figma is a collaborative interface design tool. The main feature of Figma is focused on designing user interfaces, but at the time of writing this, Figma offers quite a lot of features to accommodate even more (such as whiteboards, plugins and templates).
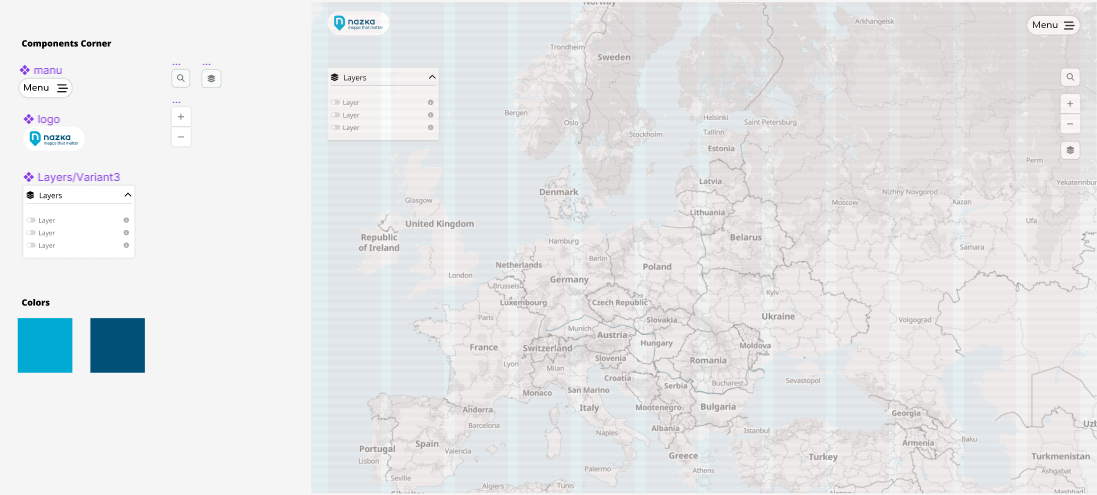
The first thing to do before creating your high-fidelity design is to prepare your common elements, such as buttons, drop-downs, checkboxes, inputs, and colours. This is what we call a component based approach. It's also possible to include components from libraries out there which will speed up the process. Keep in mind that this can also be skipped, and you can just start converting the wireframes directly to a high fidelity design. However, creating elements as components will save you a significant amount of time when creating multiple screens later on and also makes changes easy to apply to multiple screens from one change in the component.
Afterwards, the next step is to layout all the components and other design elements according to the decided layout on the wireframing stage. In this stage it's important to follow design principles, keeping measures, using proper font sizes and other technical steps that are we haven't mentioned before.
This is the stage where you add all the pictures and colours that go along with your design. It's going to take the most amount of time from the entire process as you will be testing colour combinations and align placement of design elements while considering the next step, that's prototyping. Prototyping in Figma is creating interactive flows that explore how a user may interact with your designs. Prototypes are a great way to test interactions, user flows, showcase your designs to stakeholders and get feedback from collaborators which will help in iterating your design ideas.
That's it for now! What's left is to test what has been done. Stay tuned for more tips and tricks in our next blog post, as we dive deeper into how you can organise your user interviews.


